Pinned it done it!
I'm a stay at home mom. I love helping out others and will be posting a variety of pins I find from my account on Pinterest.com Most of them will be consisting from crafts to tips and tricks. Follow me on pinterest!: http://pinterest.com/nekoangel2/
CrochetedintheRaine
Come check out my shop on etsy!
I love to crochet projects for friends and family and finally got brave enough to sell them.
If you have any questions about it, let me know!
Wednesday, November 20, 2013
Crochet FREE hat patterns!
Dang I have been gone for WAAAAY to long. I started working and I even opened up my own etsy shop!
https://www.etsy.com/people/nekoangel2?ref=si_pr < Here it is! I would love it if you checked it out.
Granted I only have 2 things posted so far BUT I am working on building up my store.
So here's what I have tested and am happy to show you guys!
Okay so here are all the things I've tested out:
http://anniespictureperfect.blogspot.com/2013/01/how-to-properly-size-crochet-hats-chart.html
^ This website here is GREAT for sizing hats. I use it ALL the time and I wanna give props to this blogger for being so helpful. Check it out it'll save you SO much time. I promise you that.
Okay so here is the first pattern I did:
Ribbed Beanie:
http://www.pinterest.com/pin/335166397239665384/
Great thing about this is that she shows you how to do it and you can make it for any size. Plus it's FREE!
Drops Purse Pattern
Now I alternated this purse a bit.
The original pattern asked for 140 stitches in the pattern and I only did 100 stitches as the base.
I didn't want it so big so that's how I fixed it :)
http://www.pinterest.com/pin/335166397239653546/ < This link here is so you can see it on my pinterest the version I did.
http://www.pinterest.com/pin/335166397239620913/ < This is the FREE pattern.
Headband pattern:
http://www.pinterest.com/pin/335166397239552976/
Oh my goodness I LOVE these type of headbands! Seriously it is so nice to finally be able to make my own.
I've made several but I don't have pictures that I've taken. Sorry!
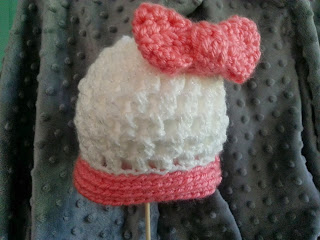
Shelled beanie
http://www.pinterest.com/pin/335166397237853193/
I LOVED this hat so much, I'm going to try and make one for myself! It was super easy to follow and I really enjoyed how you can make different variations of it too.
*Only thing I changed on my hat was instead of slip stitching on the bottom, I did a back post crochet with single crochet stitches.
Friday, August 9, 2013
Mini-mini cheesecake cupcakes!
Recipe Source
Wednesday, August 7, 2013
Hey everybody!! Update on some upcoming pins
Anyway, So I was also gone for the reason being that I also had to test a shiz nit load of pins so I could blog about them for later.
Sometimes, I have to test a recipe out or a pin out more than once so that I can make sure that what I post is the best product I have and then all the things I did to improve it.
So again, Still alive! Just remember that I will go long periods of time off when I'm testing recipes :p
Wednesday, June 26, 2013
Tutus galore!!!!
Also, because I'm using less, you'll be able to see what it looks like to have not as full to very full. So that way you can see a difference.
Pin source
Light Blue tutu:: 7-9 yards
Dark blue Tutu: 7-9 yards
Purple Tutu: 7-9 yrds
Rainbow Tutu
1.5 yds of each color
7 yards of fabric all together.
Cut fabric 6' wide while folded in half. (should already be like that since that's how it comes at the store.)
Now 1.5 yards is going to give you 6 cuts. You should have 12 pieces roughly after cutting the 6 you made in half along the seam. Even if there not cut perfectly, you should at least have 12 pieces.
Tie together 3 pieces when you are forming the knot on the elastic or ribbon.
If you tie 3 together at a time it'll make it easier to see how many pieces are left. Fairly simiple to remember.
Monday, June 24, 2013
Cheesecake (creamcheese) brownie cupcakes
It was a big hit with my in laws I would say since there was only 2 left lol.
Monday, May 20, 2013
Lemon-Garlic Chicken! In the crockpot or in the oven!
Alright so I've been on a huge kick lately of testing recipes.
The one we are testing today came about because I've been in charge of dinner a lot lately and needed something that would satisfy everyone to there ideal taste and also help budget wise.
Here is a recipe I found on pinterest:
http://pinterest.com/pin/335166397238619250/
Website:
http://www.budgetsavvydiva.com/2012/07/lemon-roasted-chicken-recipe/
Budgetsavydiva is a great site that has a lot of different ways to help save money. I highly recommend looking them up!
*The pinner I got this from said that she added 1/4 cup of water into the crock pot and didn't use ANY oil. And that she cooked it on low for 8 hours.
What I"m going to do is I"m going to do just that except I'm going to cook it on high for 6 hours but keep and eye on it so that it doesn't dry out or overcook.
So here's the ingredients:
4 pieces of boneless, chicken breasts
Salt
Pepper
Parsley (I wanted at least one more seasoning but you don't have to add this.)
Lemon (Juice and Zest
1 CLOVE of garlic.
Step 1: put 1/4 cup of water into crockpot
Step 2: Lay chicken breasts as flat as you can in crock pot (makes it easier when adding the rest of ingredients on top for even coating)
Step 3: Season chicken with Salt and Pepper
Step 4: Mince garlic
Step 5: Zest and Juice Lemon
Step 6: Combine Lemon/garlic and add just a few sprinkles of parsley
Step 7: Take garlic and lemon juice/zest, parsley and pour on top of chicken.
Step 8: Set crockpot after placing lid on top for 6 hours
DONE!
Now make your favorite sides and enjoy!
Thursday, May 16, 2013
Bacon- wrapped chicken...with a walnut, butter filling?
I was looking for a recipe that I could do for dinner yesterday and I came across this one a few days before. I hadn't looked into it to much which was a mistake on my part because you have to understand that my husband hates cream cheese, sour cream, mayo, ranch, salad dressing and tomatoes.
I happened to look at the recipe after I put the chicken into a bowl to thaw out. And there was cream cheese. Great.
I mentioned all the above things my husband doesn't like because almost every recipe I found as a filling for chicken stuffed recipes had one of the above mentioned.
I eventually gave up on not finding one that didn't have cream cheese and decided instead of that I would just use butter to replace it and then use the other ingredients.
I know the filling sounds interesting but that's what made this taste so good!
Long explanation later..... this is what I did.
Original recipe I wanted to use:
Website
http://www.tasteofhome.com/Recipes/Bacon-Wrapped-Chicken?keycode=ZPIN1112
2nd recipe that I altered the filling of
website
http://www.simplyrecipes.com/recipes/stuffed_herbed_chicken_with_boursin_cheese/
Ingredients:
- 6 medium, boneless chicken breasts
CUT IN HALF and FLATEN to a 1/2 inch
Makes 12 pieces.
12 pieces of bacon strips
*Trust me when I say this. 6 pieces is not enough for 3 people.
Filling:
*When making the filling keep wet and dry separate. It's easier to portion on each half.
Wet ingredients
- 1/2 a stick of butter (melted)
- 1/4 tsp cajun
- 1/2 tbls of Parmesan
- Pinch of salt and pepper to taste
- 1/4-1/2 tsp of oregano
- 1/2 tbls of basil
- 2 tbls of crushed walnuts
- 3 tbls of bread crumbs ( I used plain, progresso brand)
- 1/2 tsp of parsley
- salt and pepper to taste ( yes I mentioned it twice)


